A mould is usually the largest single cheque in a custom product project, and the one that is hardest to take back. Once steel is cut, design changes become slower and more expensive, so the decisions that matter most are made before the toolmaker starts machining. This guide walks through those decisions in order.
What is tooling? In manufacturing, tooling is the custom equipment made for one specific part, such as an injection mould, die-casting die or stamping die, that shapes material into that part repeatedly. An injection mould is a precision steel or aluminium tool with a cavity in the shape of the part; molten plastic is injected into it, cooled and ejected.
Spelling note: “mould” is the British spelling and “mold” the American; they mean the same thing.
Short answer: The custom tooling process for an injection mould usually runs: freeze the part design, request tooling quotes, DFM review, mould design approval, steel selection, machining and assembly, first trial (T1), corrections and further trials, and final approval with handover to production. The buyer’s sign-offs at DFM, design and sample stages control the outcome.
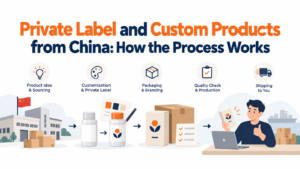
If you are still deciding whether your product needs custom tooling at all, start with our guide to private label and custom products from China, which explains when an existing product can be adapted and when a new part, and therefore a new tool, is required.
What custom tooling covers
“Tooling” is a broad word. Depending on the part, it can mean:
- Injection moulds for plastic parts (the focus of this guide)
- Die-casting dies for aluminium or zinc parts
- Stamping or press dies for sheet-metal parts
- Extrusion dies for continuous profiles
- Blow moulds for hollow plastic items such as bottles
- Fixtures and jigs used for assembly or testing
The stages below are written for injection moulds because they are the most common tooling purchase for importers developing their own products. Most of the logic (design review, approval gates, trials and sign-off) applies to other tool types as well.
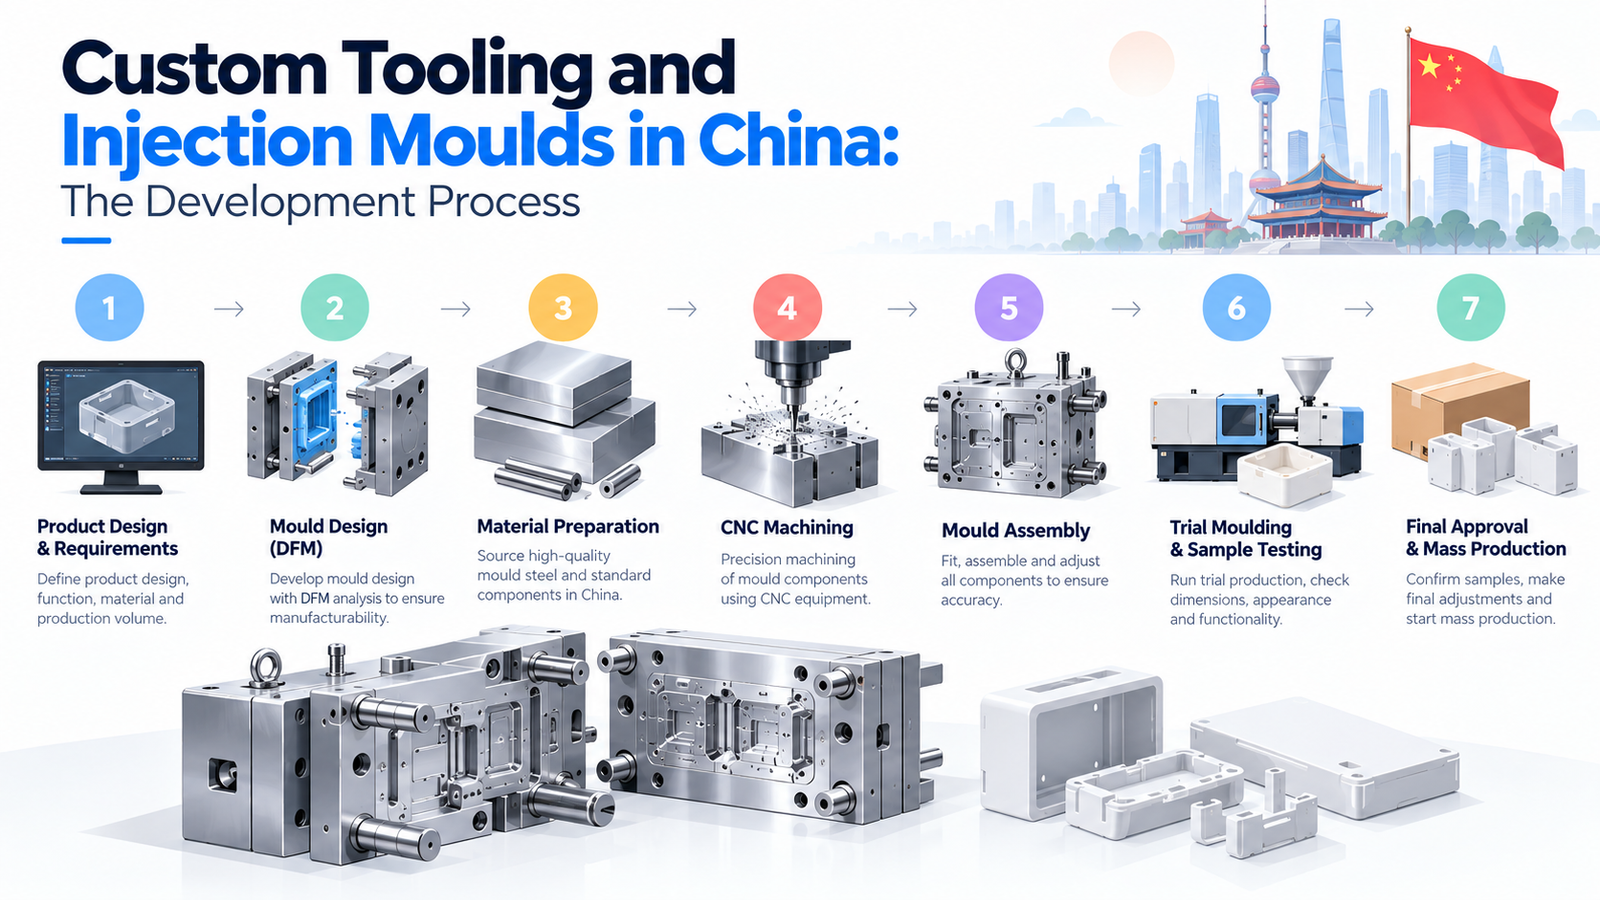
The custom tooling process in 9 steps
- Freeze the part design and prepare files. Provide 3D CAD files and 2D drawings with critical dimensions, tolerances, material, colour and surface finish.
- Request tooling quotations. Send the same package to several toolmakers and ask each to quote on the same basis: mould class or shot life, cavities, steel, runner type, trials included and lead time.
- DFM review. The toolmaker checks the part for manufacturability and returns a DFM report proposing changes such as draft angles, wall thickness, gate location and parting line.
- Mould design approval. The toolmaker produces the mould design; the buyer approves key choices such as gate position, ejector pin locations, parting line and slides before steel is cut.
- Steel selection and ordering. Steel grade is confirmed for the cavity, core and mould base according to shot life, resin and surface finish.
- Machining and assembly. The tool is built through CNC machining, EDM, wire cutting, polishing, fitting and assembly.
- First trial (T1). The mould is run on an injection moulding machine for the first time and T1 samples are produced for review.
- Corrections and further trials (T2, T3 and so on). The toolmaker adjusts the steel and process to fix dimensional, cosmetic or functional issues, then runs another trial.
- Final approval and handover. The buyer approves final samples (and texture, if applied), the reference sample is sealed, and the mould moves into production or to the moulding supplier.
The table below shows what the buyer contributes at each step and what document should come out of it.
| Step | What happens | Buyer’s role | Output to keep on file |
|---|---|---|---|
| 1. Design freeze | Part geometry, material and finish fixed | Provide CAD, drawings, resin, volumes | Released drawing set with revision number |
| 2. Quotation | Toolmakers price the tool on a common basis | Send identical package; compare like for like | Written quotations with specifications |
| 3. DFM review | Manufacturability problems identified | Accept, reject or discuss each change | Signed DFM report |
| 4. Mould design | Tool layout, gates, ejectors, slides designed | Approve layout before steel cut | Approved mould design drawings |
| 5. Steel selection | Grades confirmed and ordered | Confirm grade matches agreed shot life | Steel specification (and material certificate if requested) |
| 6. Machining | Tool manufactured and assembled | Request progress updates and photos | Progress reports |
| 7. T1 trial | First shots produced | Review samples, measurements, trial parameters | T1 samples and trial report |
| 8. Corrections | Steel and process adjusted; re-trials | Approve corrections; avoid new design changes | Updated samples and reports per trial |
| 9. Approval & handover | Final samples approved; texture applied if specified | Sign final samples; confirm ownership terms | Signed approval, reference sample, mould photos and nameplate details |
Steps 1–2: getting the inputs right
Toolmakers can only quote and design from what you send. Missing tolerances, an undecided resin or no annual volume estimate leads to quotes that cannot be compared and DFM reports that miss the point. A planned guide to what a toolmaker needs from you (CAD files, drawings and volumes) will go through the input package in detail.
When the quotes come back, the same discipline used in comparing quotations from Chinese suppliers applies: check that each toolmaker has quoted the same cavities, steel, runner system, number of trials and lead time before you compare prices. Our planned article on reading a mould quotation line by line will break down the individual quote lines, and a separate planned guide covers what determines the price of an injection mould.
What is DFM?
DFM stands for Design for Manufacturing (sometimes Design for Manufacturability). In tooling, a DFM review is the toolmaker’s analysis of your part design to find features that would make the part difficult, unreliable or expensive to mould, and to propose changes before the mould is designed.
A typical injection-moulding DFM report looks at:
- Draft angles: slight tapers on vertical walls so the part releases from the mould. Walls with no draft can scrape, stick or drag on ejection.
- Wall thickness: uneven or very thick sections cool unevenly and can cause sink marks, voids or warping.
- Undercuts: features that prevent straight ejection and may require slides or lifters, which add cost and complexity.
- Gate location: where plastic enters the cavity. It affects flow, visible marks and weld lines.
- Parting line: where the two halves of the mould meet. It leaves a visible line on the part.
- Ejector pin positions: pins push the part out and leave small marks, so their location matters on cosmetic surfaces.
- Shrinkage and warpage: plastics shrink as they cool, and the amount depends on the resin. The toolmaker sizes the cavity to compensate.
Some toolmakers also run a mould-flow simulation, software that predicts how plastic fills the cavity, to support gate and cooling decisions. It is useful for complex or cosmetic parts but not always necessary for simple ones.
Why DFM matters to a buyer: every DFM change you accept now is cheaper than the same change made after steel is cut. Every change you reject should be rejected knowingly, with the toolmaker’s stated risk recorded. If you lack the technical background to judge a DFM report, have someone with moulding experience review it before you sign.
Mould class, shot life and steel choice
Two related decisions shape how long the tool lasts and what it costs: the mould’s intended shot life (how many cycles it should run) and the steel used to build it.
A widely used reference is the mould classification originally published by the Society of the Plastics Industry (SPI), now the Plastics Industry Association. It is commonly summarised as follows:
| SPI mould class | Commonly cited intended use | Typical buyer situation |
|---|---|---|
| Class 101 | Extremely high production, around one million cycles or more | Very high-volume, long-life products |
| Class 102 | Medium-to-high production, up to around one million cycles | Established products with strong, steady demand |
| Class 103 | Medium production, under around 500,000 cycles | Many importer-developed consumer products |
| Class 104 | Low production, under around 100,000 cycles | Limited runs, non-abrasive materials |
| Class 105 | Prototype only, a very small number of parts | Testing fit and function before production tooling |
Treat these as a shared vocabulary, not a guarantee. Not every Chinese toolmaker quotes in SPI terms, and definitions can vary in practice. Write the expected shot life, the steel grades and any warranty on cycles into your purchase agreement rather than relying on a class label alone. Our planned guide on prototype tooling versus production tooling explains when a short-life tool makes sense.
Common steel names you may see on Chinese quotes include pre-hardened grades such as P20 and 718H for general production moulds, hardened tool steels such as H13 for longer life or abrasive resins, and stainless grades such as S136 where corrosion resistance or high polish is required. Aluminium is sometimes used for prototype or low-volume tools. The right choice depends on volume, resin and finish, so ask the toolmaker to state the steel for cavity, core and mould base separately.
Cavity count (how many parts each cycle makes) and runner type (cold runner or hot runner) are the other big decisions. Both affect tool cost and part price in opposite directions, which is why they belong in the cost discussion covered by our planned injection mould cost guide.
Tolerances and drawings
The 2D drawing tells the toolmaker which dimensions matter. Mark critical dimensions clearly and state tolerances on them. For dimensions without a specific tolerance, drawings often refer to a general-tolerance standard such as ISO 2768. For moulded plastic parts, engineers increasingly reference ISO 20457, which addresses tolerances for plastic moulded parts specifically. Agree which standard applies, because plastic parts cannot always hold tolerances that are routine for machined metal.
Tight tolerances on every dimension raise tool cost and the number of correction loops. Tolerance only what affects fit, function or appearance.
How many trial rounds are normal?
There is no fixed number. Simple parts with generous tolerances are sometimes approved after the first or second trial, while complex parts, tight tolerances, multi-cavity tools or demanding cosmetic surfaces can take more rounds. It is normal to plan for at least one correction loop after T1.
What you can control is the commercial side:
- Agree how many trials are included in the tool price and who pays for trials beyond that.
- Separate toolmaker errors from buyer changes. Corrections needed to meet the approved drawing are normally the toolmaker’s responsibility; design changes requested by the buyer after mould design approval are normally chargeable. Write this distinction into the agreement.
- Ask for a trial report with each round: machine used, key process settings, resin grade and dimensional measurements against the drawing.
T1 samples will show the first real evidence of the tool’s quality: dimensions, flash, sink marks, short shots, gate marks, warpage and surface finish. A planned guide on T1 samples and mould trials will cover exactly what to review on each trial sample.
Steel-safe design
Toolmakers often leave critical dimensions “steel-safe” on purpose: they cut the cavity so that metal can still be removed to bring a dimension into tolerance after T1. Removing steel is relatively easy; adding it back usually means welding or inserts. If your design is likely to need fine-tuning, discuss which dimensions should be steel-safe at the design stage. Our planned article on mould modification versus a new mould covers the limits of later changes.
When does the buyer approve the tool?
Approval is not one moment. It is a series of gates, and each gate should produce a signed record:
- DFM sign-off: before mould design starts.
- Mould design sign-off: before steel is cut. This is the last cheap point to change gate, parting line or ejector positions.
- Trial sample reviews: after each trial, the buyer accepts or lists corrections.
- Dimensional and functional approval: final samples measured against the drawing and tested in assembly or use.
- Texture or finish approval: if the part is textured, texture is usually applied after dimensions are approved, followed by another sample check.
- Final tool acceptance: signed approval of final samples, sealed reference samples for both parties and confirmation that the tool is ready for production.
Payment milestones are often linked to these gates, for example a deposit at order and the balance on sample approval. The split is a matter for negotiation, and our planned guide to paying Chinese suppliers covers deposit terms more broadly. Whatever split you agree, avoid paying the final tooling balance before you have approved samples from the actual tool.
Approved samples become your quality reference. A planned guide on golden samples explains how they are sealed, stored and used at inspection.
Ownership, storage and documents
Paying for a mould does not automatically settle who owns it, where it is stored, who maintains it or whether it can be moved. Agree those points in writing before you pay the deposit, not after the tool is finished. Our planned guide to mould ownership will cover the clauses to include, and the planned article on protecting your design when manufacturing in China covers NNN agreements and related protections.
Keep a tooling file for every mould you pay for:
- Released part drawings and CAD files (with revision numbers)
- Signed DFM report and mould design approval
- Steel specification and, if supplied, material certificates
- Trial reports and sample approvals for each round
- Photos of the finished tool and its nameplate or engraved mould number
- The signed ownership, storage and maintenance agreement
Where tooling projects usually go wrong
| Problem | Typical cause | Prevention |
|---|---|---|
| Endless correction loops | Design changes made after steel cut | Freeze design before mould design approval; treat later changes as formal change orders |
| Quotes that look cheap, then grow | Fewer cavities, softer steel or fewer trials than competitors quoted | Quote on an identical specification; list inclusions in writing |
| Parts warp or show sink marks | Uneven wall thickness ignored at DFM | Take DFM comments seriously; ask for flow analysis on complex parts |
| Parts are in tolerance, but assembly fails | Drawing tolerances do not reflect mating parts | Test samples in the real assembly, not just against the drawing |
| Surface finish disputes | Texture or polish level described in words | Specify finish by an agreed standard or physical reference plate |
| Resin substituted in production | Grade not fixed in writing | State resin brand and grade on the drawing and in the order |
| Tool cannot be moved to another moulder | Ownership and transfer not agreed | Sign an ownership and transfer agreement before deposit |
The toolmaker’s own capability also matters. Before committing to a mould shop, the supplier-checking principles in our guide to verifying a Chinese supplier before you pay apply, and an on-site look at equipment and workload using a factory audit checklist can confirm that the shop has the machining and trial capacity it claims. A planned guide on questions to ask a toolmaker will cover tooling-specific checks such as in-house machining, trial presses and shot warranties.
After the tool is approved
Approval of the tool is not the end of the custom product project. Production samples, packaging, inspection and shipping still follow, in the same order set out in our overview of the full China sourcing process. Packaging dimensions, for example, should be confirmed from final moulded parts rather than from CAD, using a packaging specification checklist once the part is fixed. Ongoing inspections then check that production parts still match the approved sample, as described in our guide to quality control stages in China sourcing. The wider stages from prototype to pilot run to mass production are the subject of a planned workflow guide in the custom-products cluster.
Bangladesh-based buyers: practical notes
For buyers based in Bangladesh, the mould itself usually stays at the moulding factory in China, and only finished parts or products are imported. Two points are worth thinking about early:
- Tool location and future transfer. If you might later move production, for example to another Chinese supplier or to a moulder elsewhere, your ownership agreement and tooling file need to support that move.
- Remote approvals. Trial samples have to travel to you or be reviewed by someone at the factory. Agree with the toolmaker how samples, measurement reports and videos of trials will be shared, and allow time for sample shipping between each trial round.
Any import of a tool itself, or of moulded parts, follows the normal import process and HS classification described in our guide to importing from China to Bangladesh; confirm current requirements with your C&F agent.
Sourcing and coordinating a tooling project
Most importers do not need to become tooling engineers, but they do need someone to keep the toolmaker, the specification and the approvals aligned. Jingxin Sourcing sources tooling and moulds, supports mould trials as part of custom product development, and negotiates product price, MOQ, lead time and payment terms with suppliers, with staff carrying out factory audits and product inspections in locations including Yiwu, Shenzhen and Guangzhou.
For help finding a toolmaker and keeping the project on track from DFM to approved samples, see Jingxin’s tooling and mould sourcing support. If the mould is one part of a larger custom product, the custom product development service covers the wider project. The most useful next read in this cluster is the planned guide to injection mould cost, which explains why tooling quotes for the same part can differ so widely.
FAQ
What are the stages of mould development?
The usual stages are design freeze, tooling quotation, DFM review, mould design approval, steel selection, machining and assembly, first trial (T1), corrections and further trials, and final approval with handover to production. The buyer signs off at DFM, mould design, each trial review and final sample approval.
What does DFM mean in injection moulding?
DFM means Design for Manufacturing. A DFM review is the toolmaker’s report on features of your part that would be hard or risky to mould, such as missing draft, uneven walls, undercuts or poor gate positions, with proposed changes. It should be completed and signed before mould design starts.
How many mould trials are normal before approval?
There is no fixed number. Simple parts may be approved after one or two trials, while complex or tight-tolerance parts often need more. Plan for at least one correction loop and agree in the contract how many trials are included and who pays for extra rounds.
Can I change my design after the mould is made?
Sometimes. Changes that remove steel (making a feature bigger in the part, or adjusting a steel-safe dimension) are often possible. Changes that need steel added back may require welding, inserts or new cavity components, and large changes can mean a new mould. Expect design changes after mould design approval to be charged to the buyer.
Is mould the same as mold?
Yes. “Mould” is the British English spelling and “mold” the American English spelling of the same word. Both are used in the tooling industry, and Chinese suppliers use either.
Closing note: decide early, approve in writing
The tooling process rewards buyers who make their decisions at the front end, freezing the design, taking DFM seriously and approving the mould layout before steel is cut, and who document each gate. Keep the signed records and the reference samples together, and the mould you paid for will remain a usable asset rather than a dispute waiting to happen.